PRODFeature
The Tools You Need For Your At-Home Bar, According To A Bartender
Equipment advice from a former professional.
photo credit: Emily Schindler
PRODFeature
I spent a good portion of my 20s behind a bar. And, when I wasn’t behind a bar, I was often juicing limes, hauling ice, and trying to make mulled wine in a professional kitchen where the cooks didn’t take kindly to barbacks and bartenders who weren’t fully versed in kitchen etiquette. (Remember to say behind when you’re behind someone, by the way.) Now that my brain is fully (and irreversibly) filled with bar knowledge, I’m here to pass some wisdom along.
Let’s start with your basic at-home bar setup. Here’s everything you need to make restaurant-quality drinks or maybe even open a bar in your own home one day (permits permitting). Grab all of this stuff, and you’re pretty much a pro.
I’ve been over this a few times already, but the consensus choice among bartenders is the two-piece Boston-style shaker. The cups fit together with a light smack, and - while it takes some practice for newbies to figure out how to get them apart again - this style of shaker lends itself to speed and efficiency. There are some varieties out there that utilize an actual pint glass, but go for an all-metal version. This Koriko setup is a modern classic.
Get Koriko shaking tins ($17) →
As a rule of thumb, you should stir (rather than shake) any drinks that don’t have juice in them. And that means you’ll need a vessel for stirring. Can you use one of your shaker tins? Of course, but that isn’t very stylish. Gift yourself this Kiroto mixing glass.
Get a Kiroto mixing glass ($33) →
Once you grab a mixing glass, be sure to get a bar spoon. It’s what you use to actually stir your drink, and the best ones out there have twisted handles to help you rotate them in your hand. Here’s the one I use.
Get a Teardrop bar spoon ($18) →
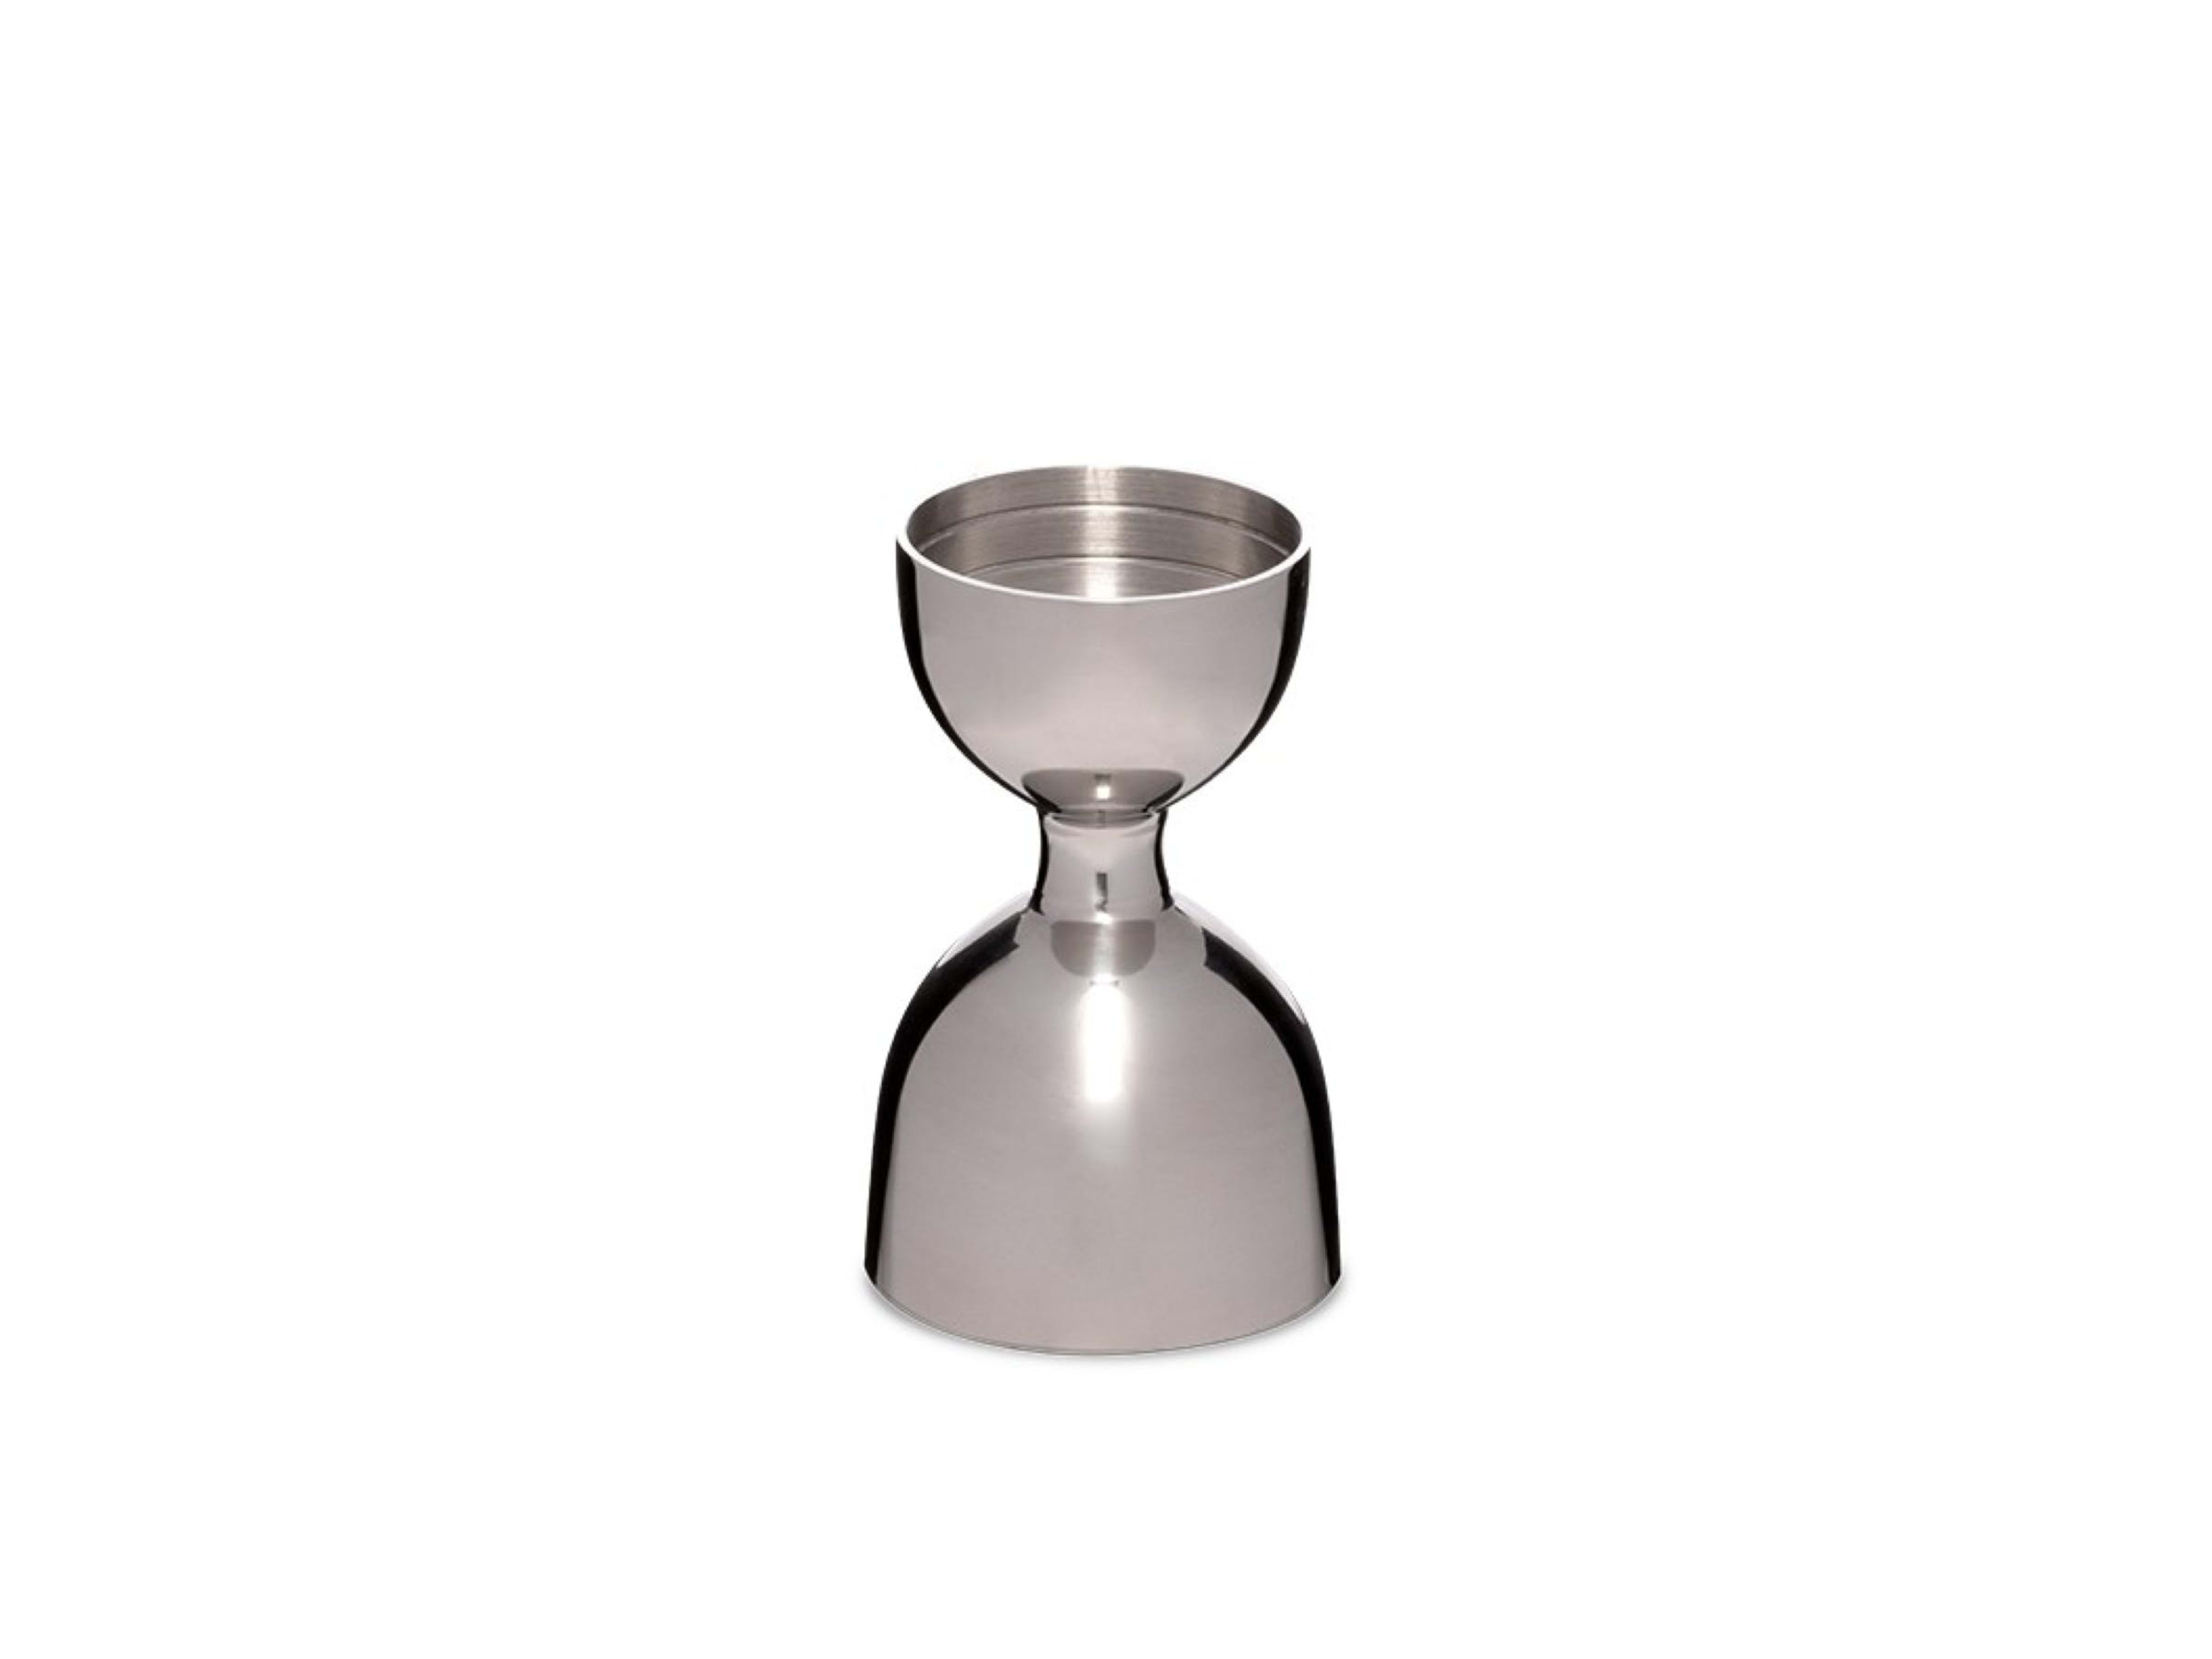
You need to measure all of your ingredients. And when I say all, I mean all of them. How do you do that? With a jigger, of course. I’m partial to this Leopold Jigger from Cocktail Kingdom which can accurately measure anywhere from .25 to 2 ounces and has a luxurious heft to it.
Unless you plan on drinking your Gimlets and Margaritas straight out of your shaker, you’re going to require a Hawthorne strainer. It’ll help you transfer your cocktail to your glass without making a mess, and it’ll filter out any big bits of debris like mint leaves or muddled raspberries. This type of strainer is ideal for shaken drinks (although it works for stirred ones as well), and this Koriko version will fit snugly on top of your shaking tins.
Get a Koriko Hawthorne strainer ($16) →
When it comes to stirred drinks (Negronis, Martinis, etc.), a julep strainer is the traditional choice. Will a Hawthorne strainer work just as well? Yes, but don’t overthink it. Just pick up one of these round, perforated strainers, and enjoy the ritual.
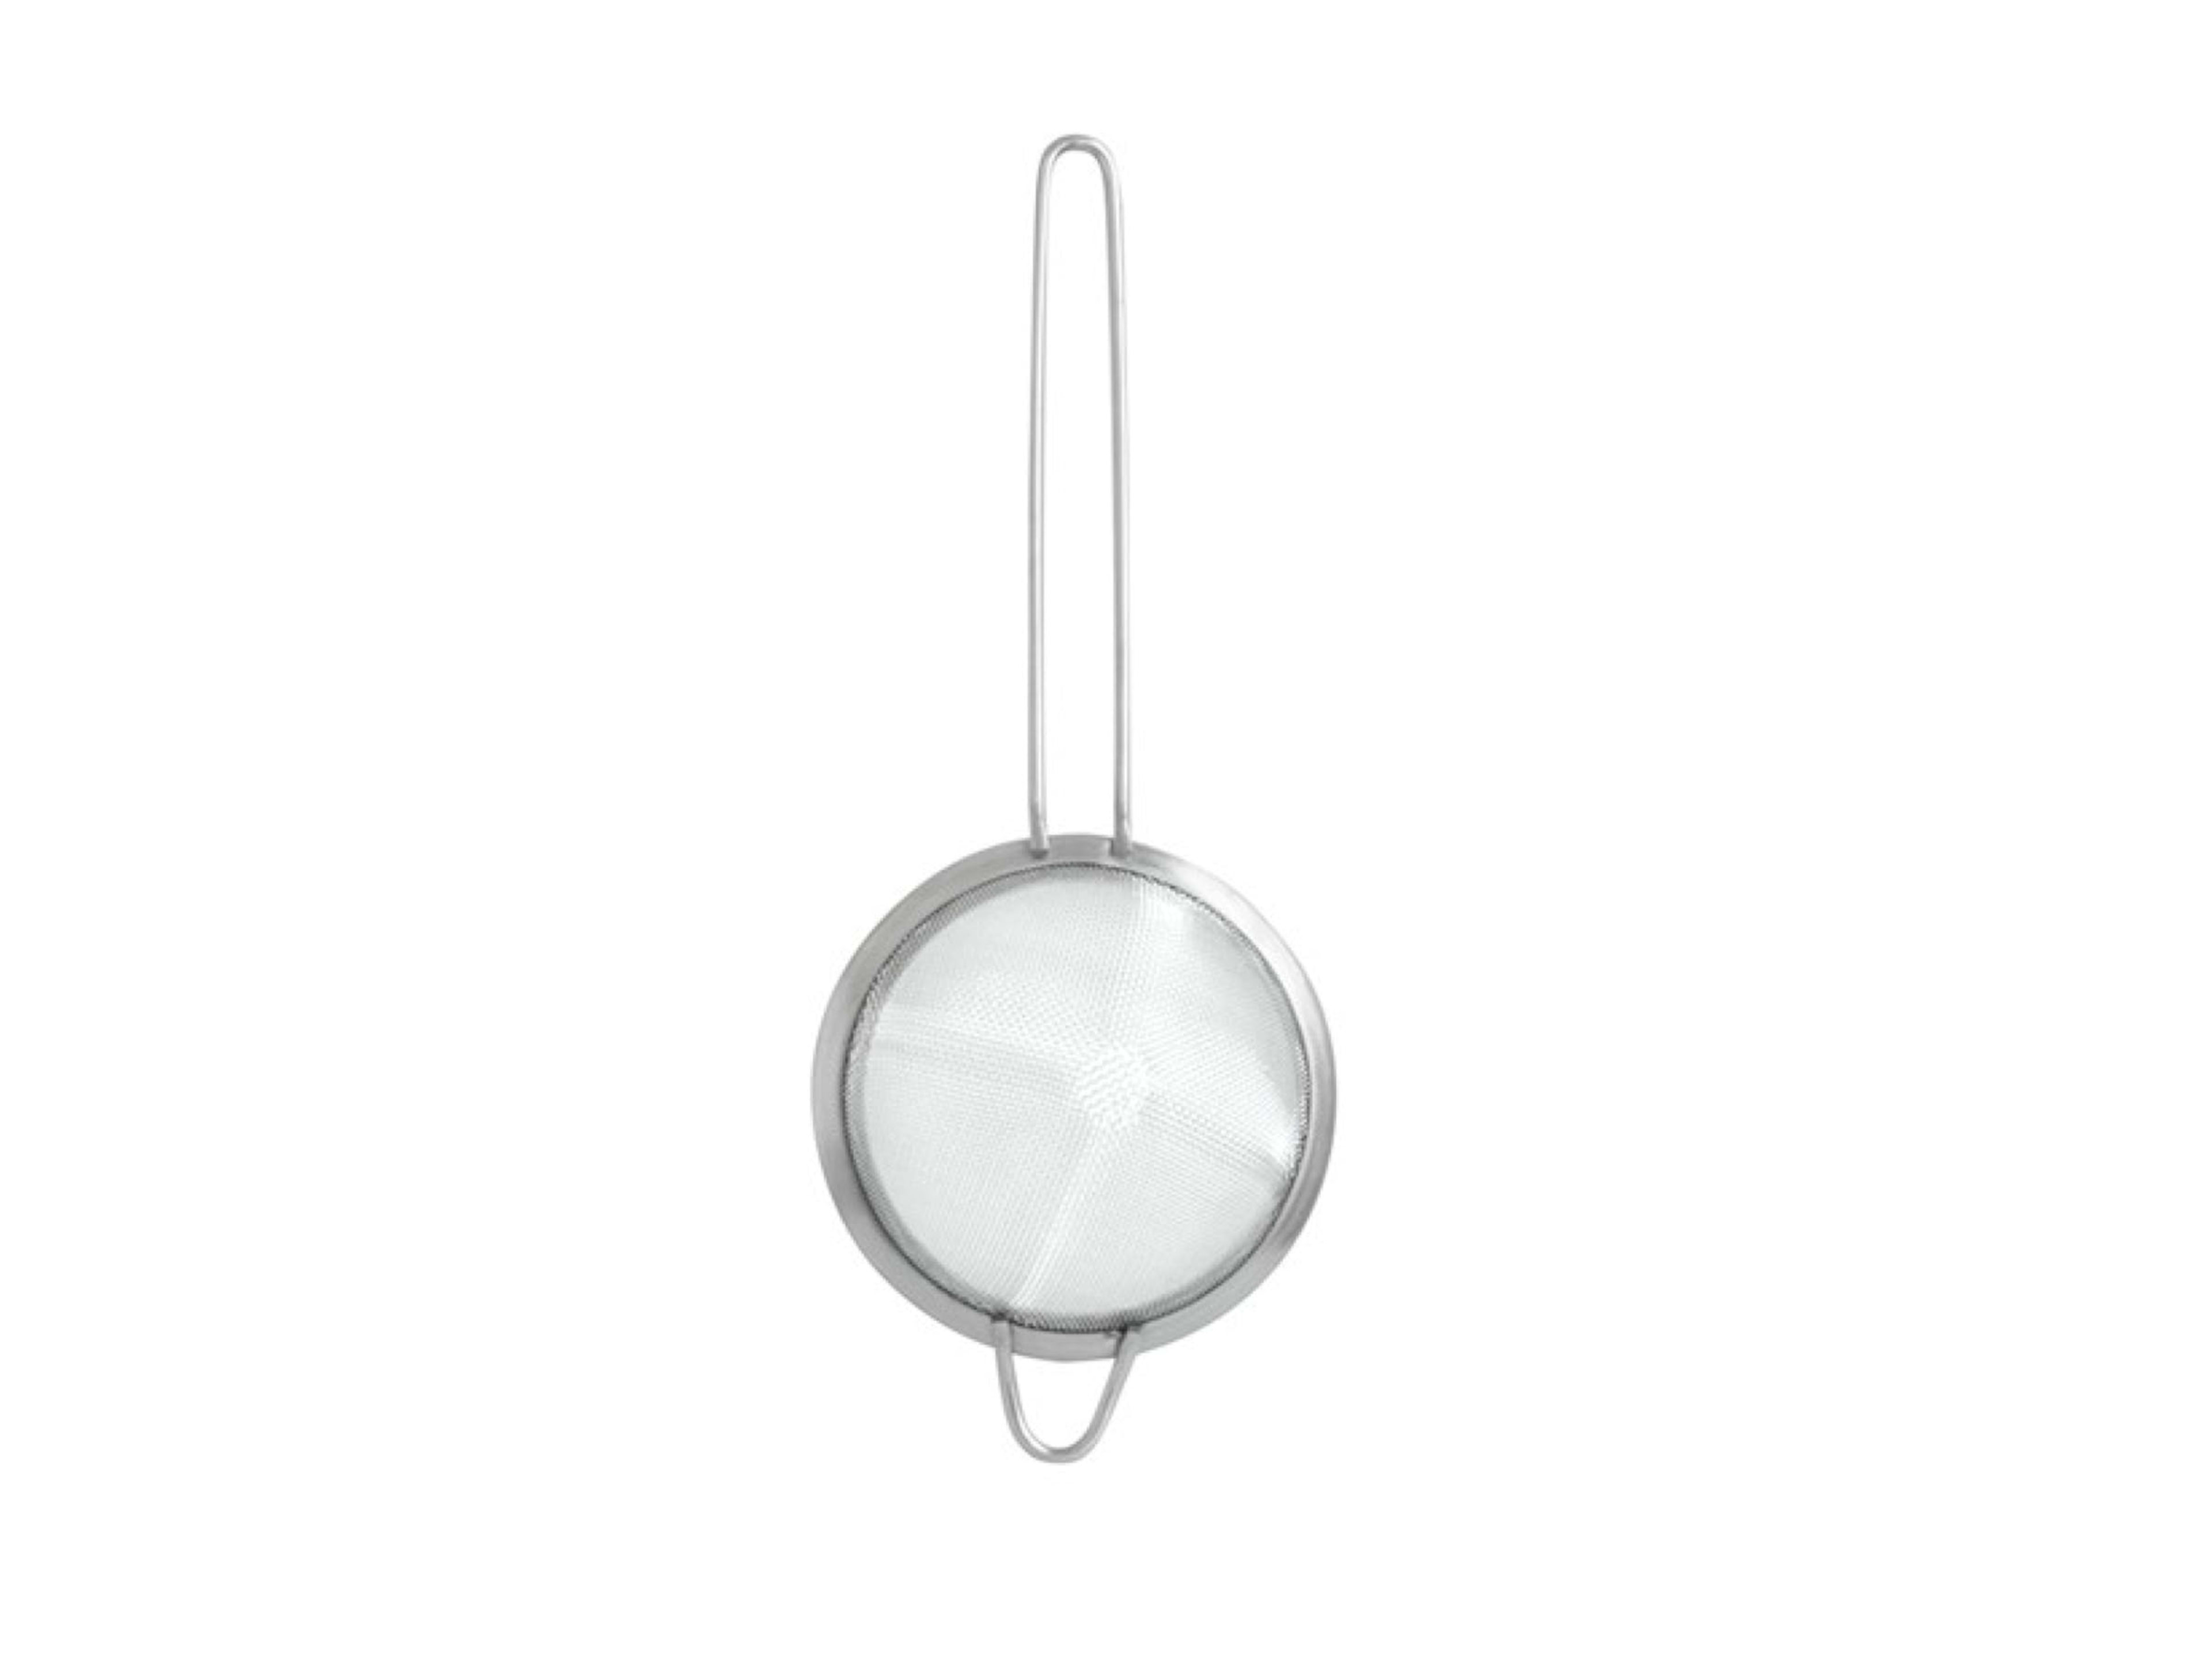
Oh gosh, we’re entering nerdy terrain here - but stick with me. You should get a fine mesh strainer (also occasionally called a tea strainer). When used in tandem with a Hawthorne strainer, it’ll help you filter out any pesky seeds or tiny shards of ice that might otherwise wind up in your drink.
Get a Coco mesh strainer ($7) →
Shake and stir with whatever sort of ice you want. (I buy mine from the bodega below my apartment sometimes.) But when it comes to serving your drinks, be sure to have some big cubes on hand. You can always make your own, or, if you don’t have time to freeze and carve a massive block of water, you can buy these silicone trays instead.
Get Rippl ice cube trays ($10 for 2) →
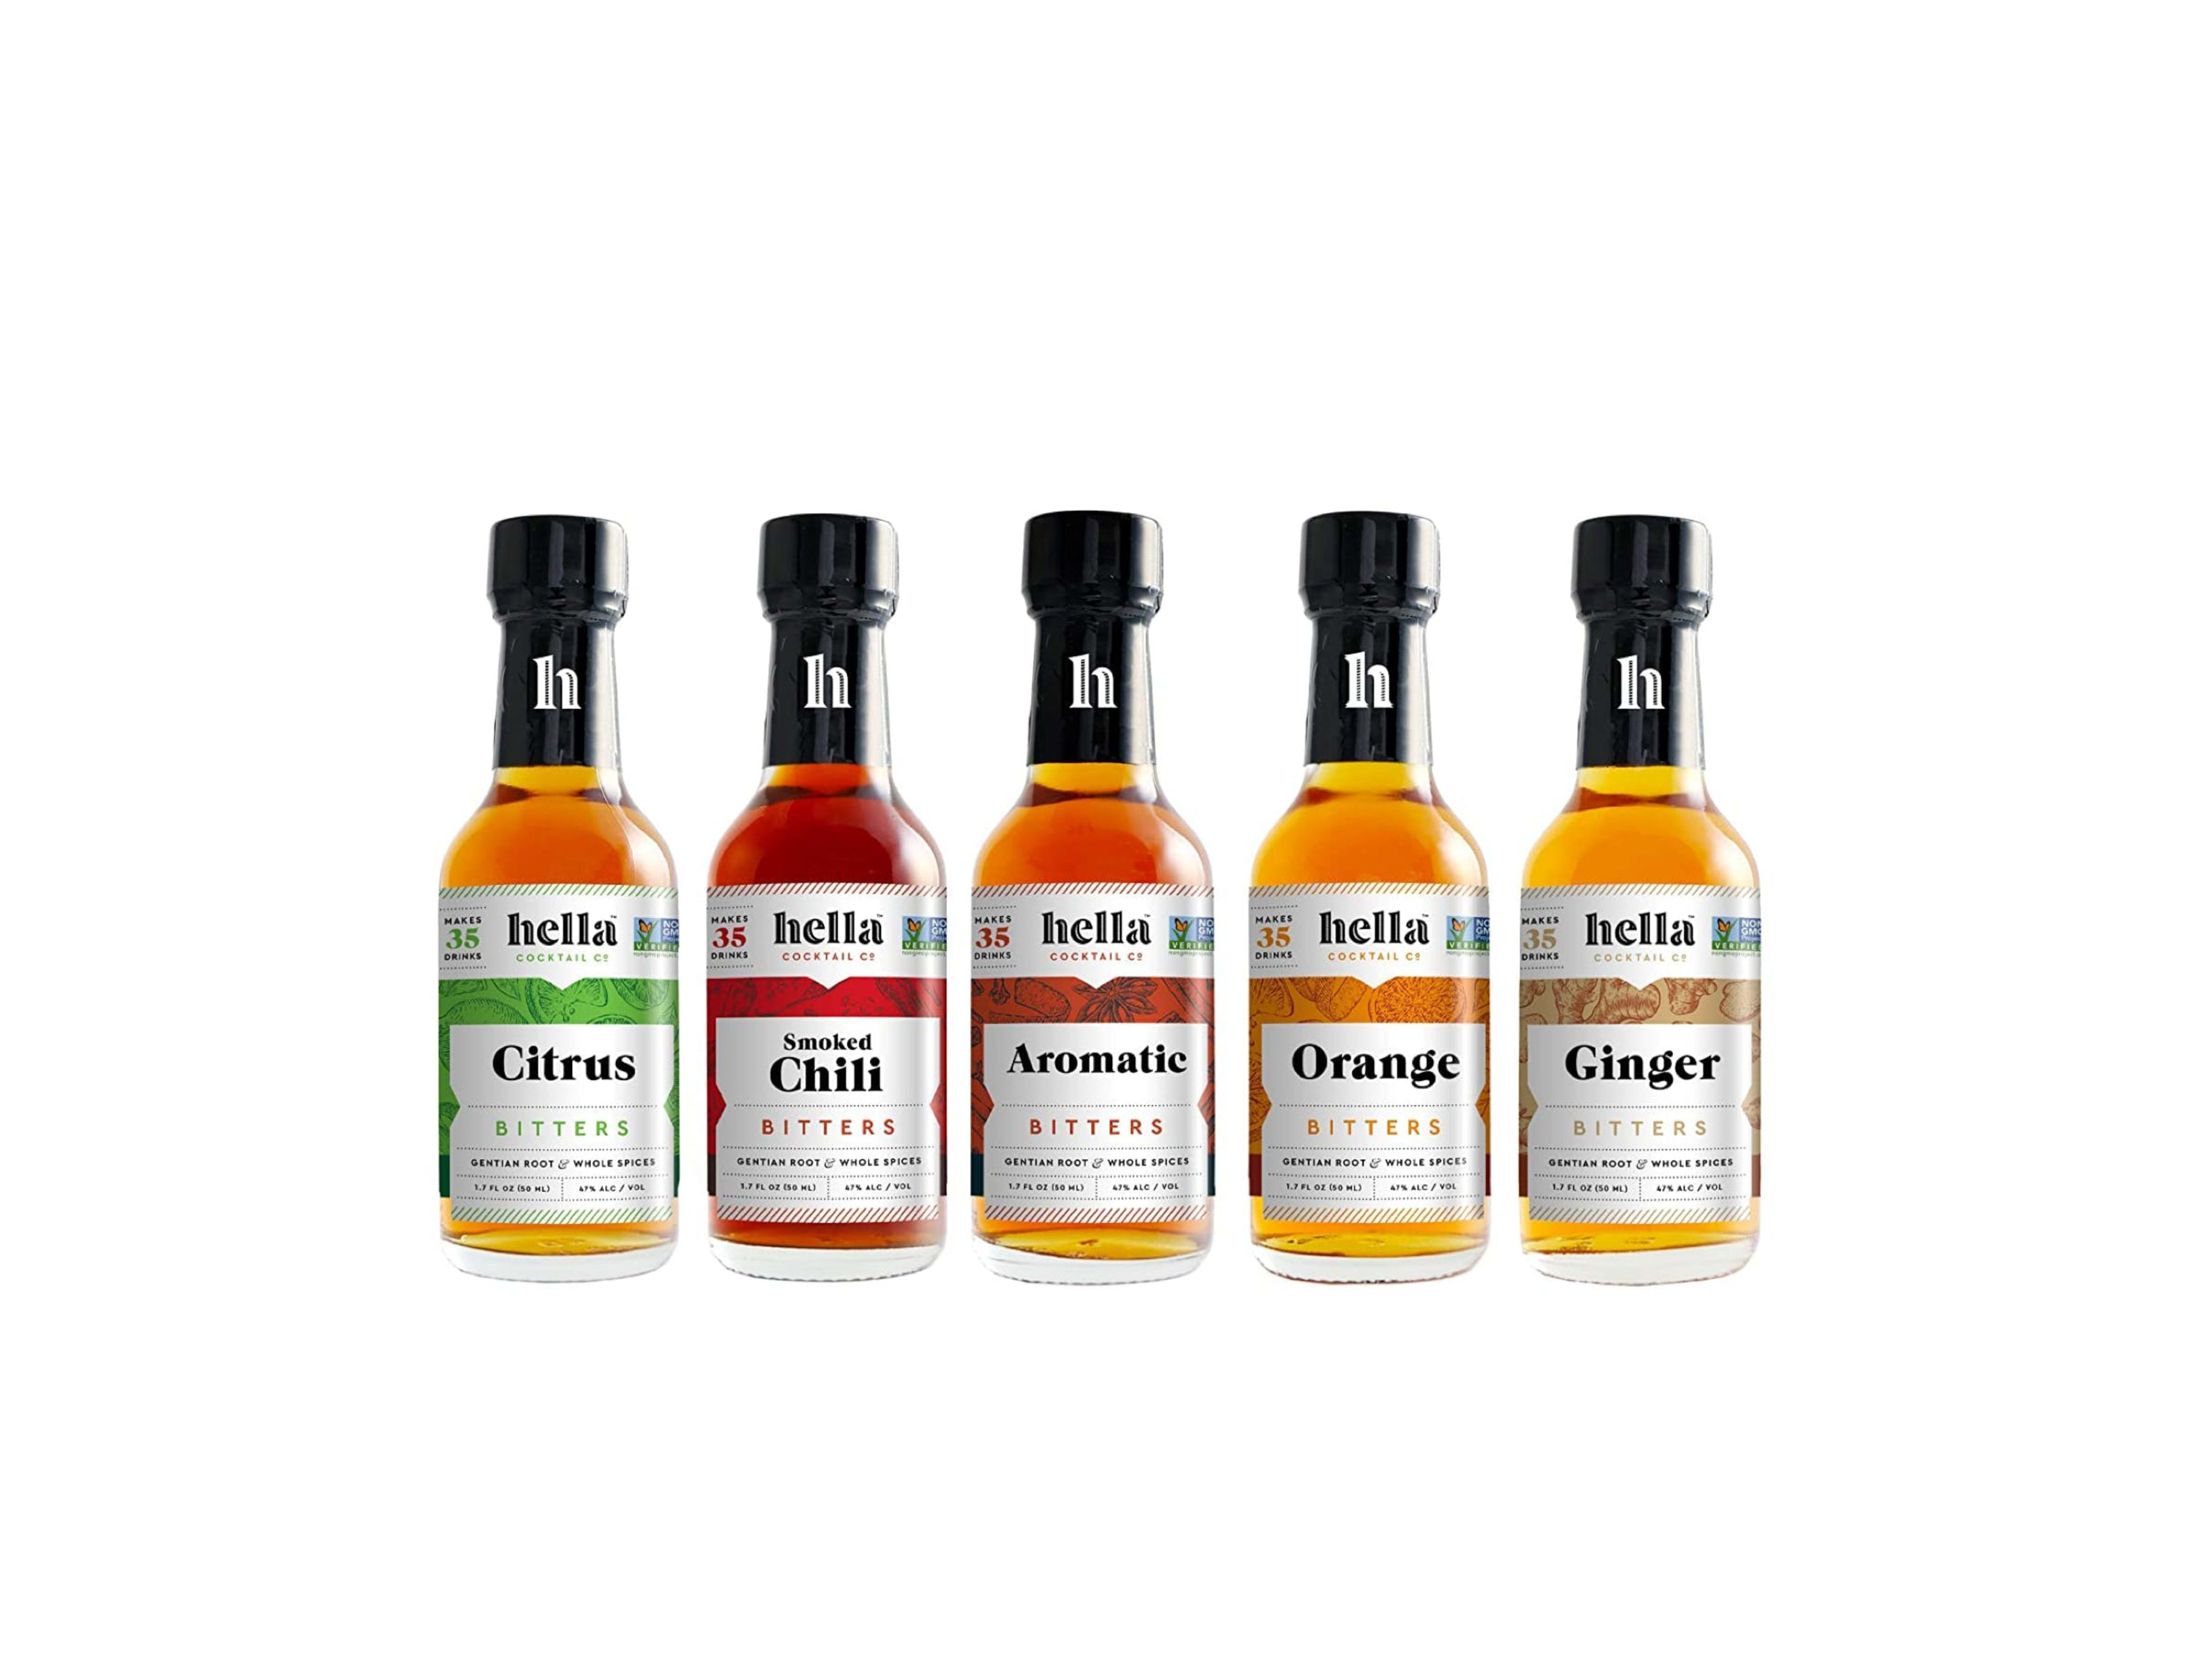
Bitters are essential for a handful of drinks from an Old Fashioned to a Sazerac, but they can really be used almost anywhere. And if you’re looking for some interesting flavors to add to a Margarita or a Daiquiri, check out this full rundown on some of my favorite kinds. Just getting started? Try this variety pack from Hella Cocktail Co.
Get Hella Cocktail Co. bitters ($35) →
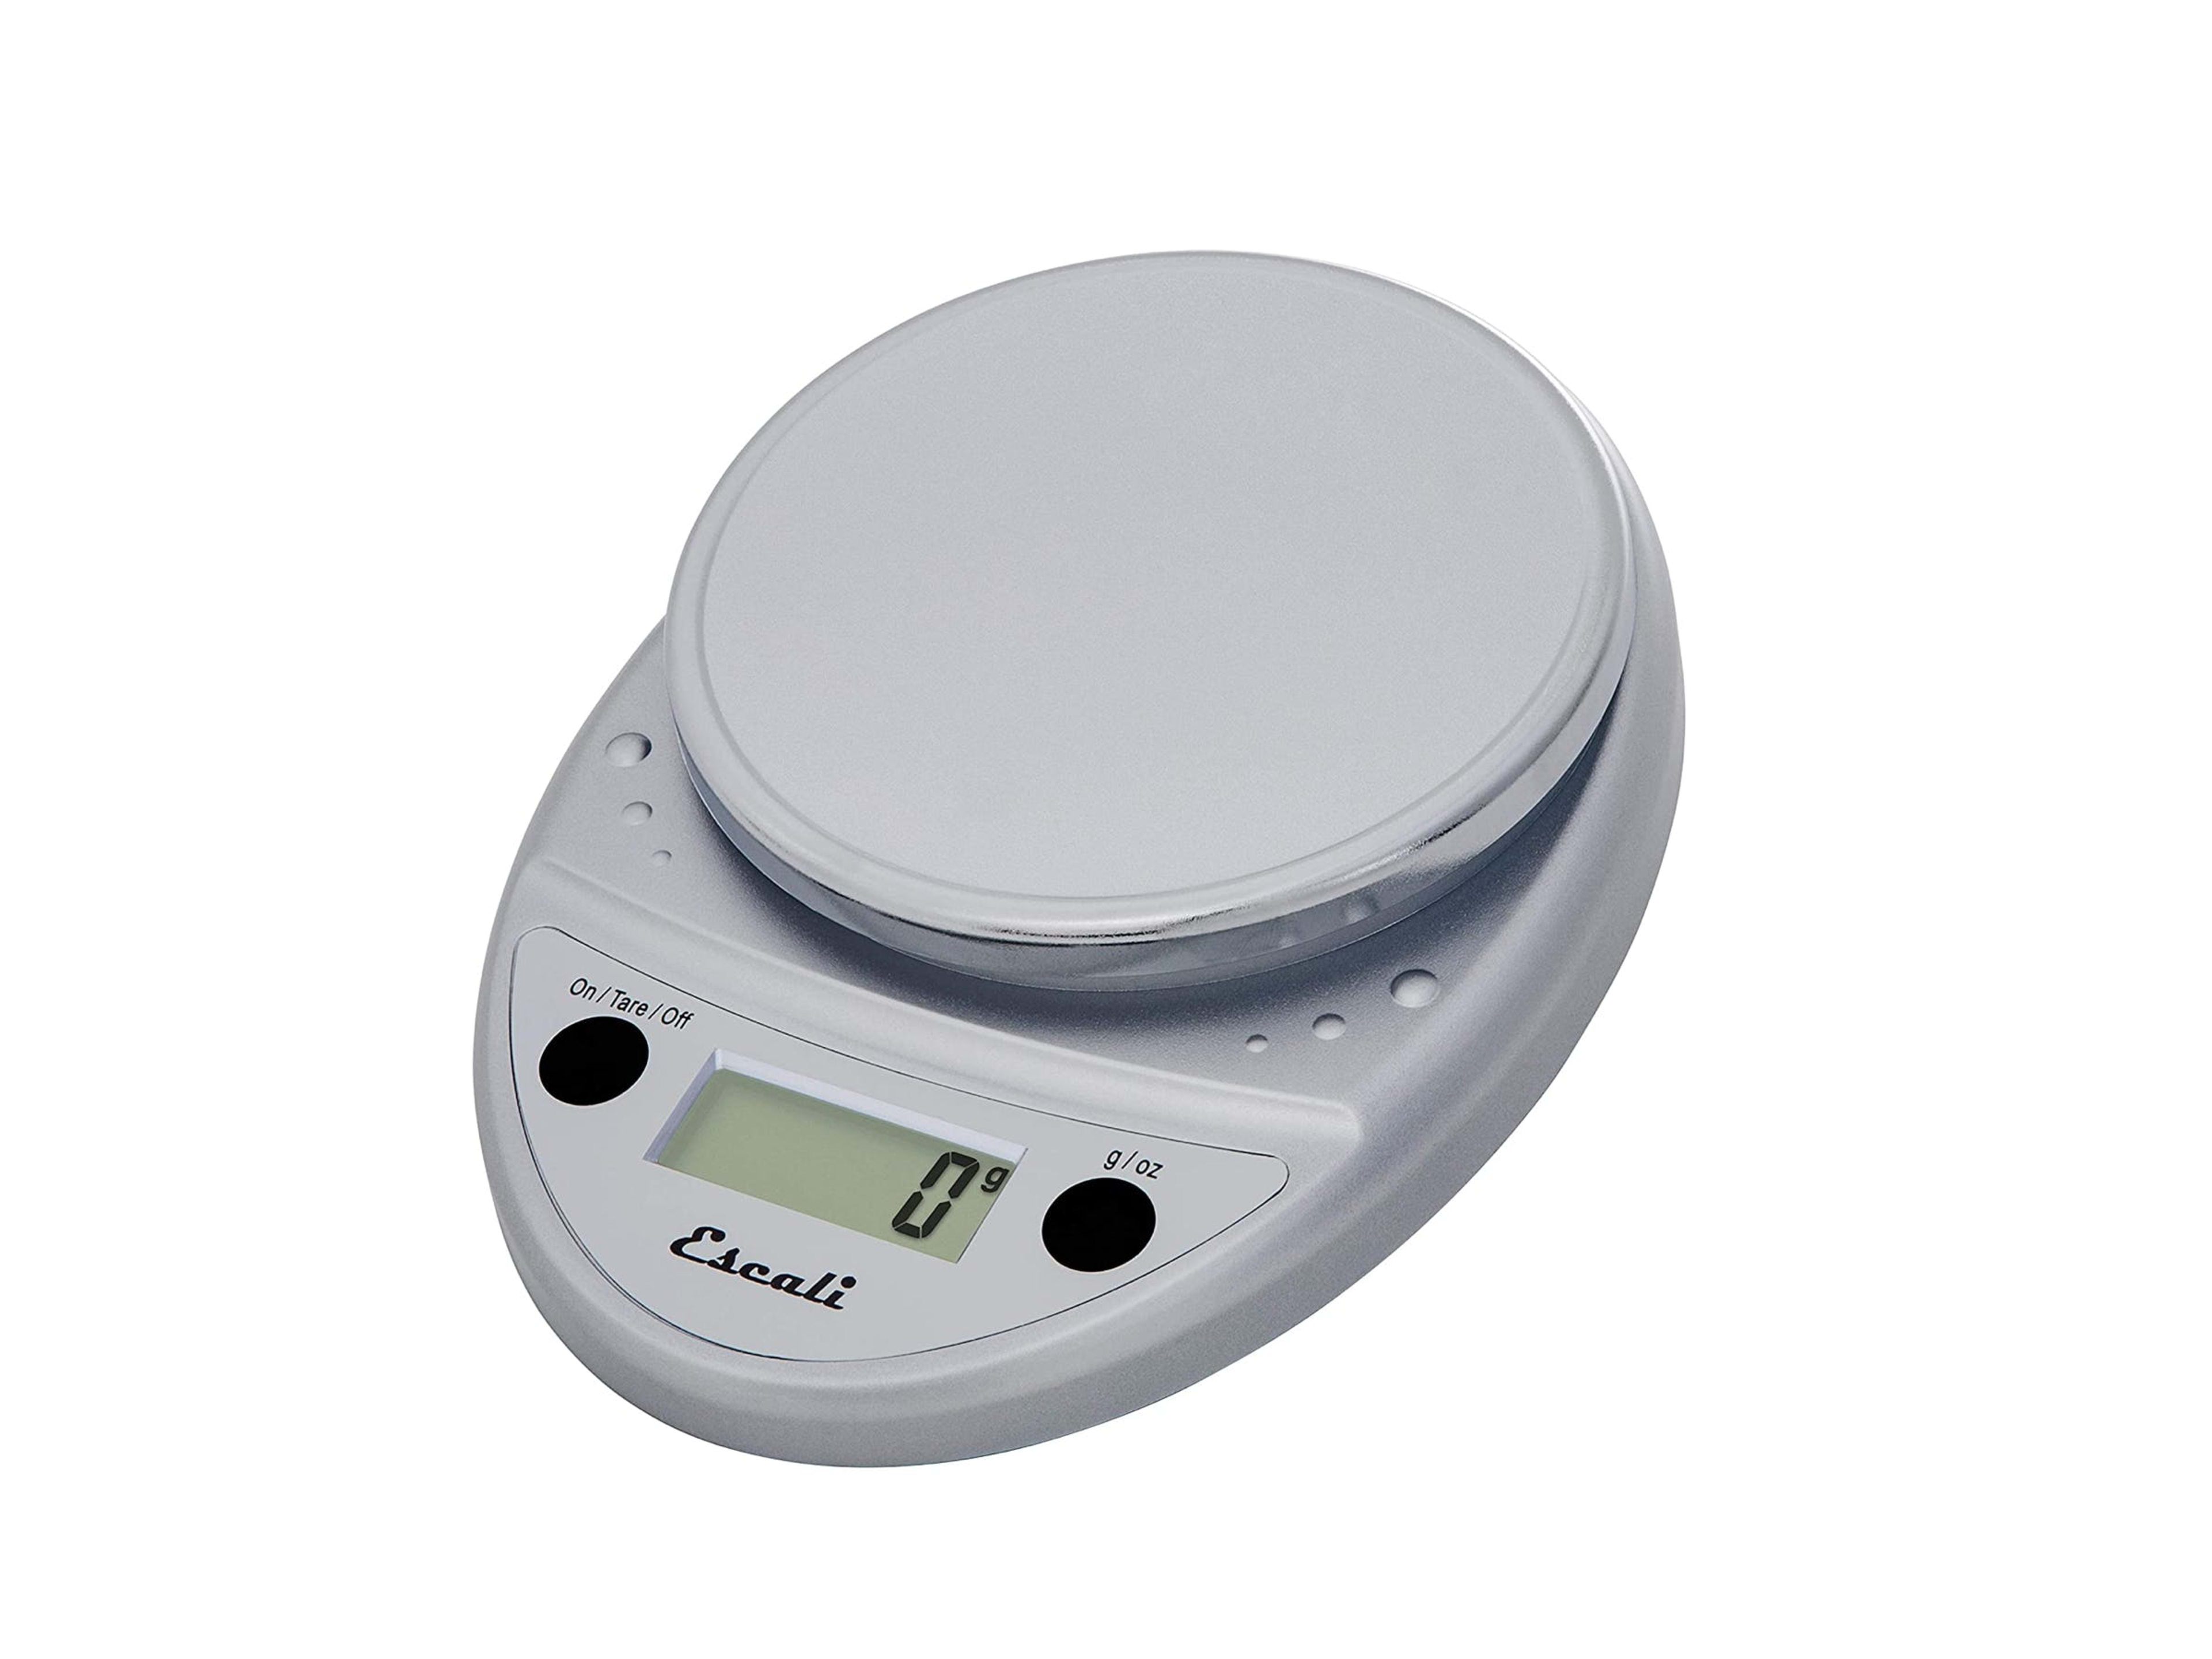
Want to make make your own bitters? Or infuse some tequila? If so, you’re either going to have to weigh your ingredients or just cross your fingers and hope for the best. The latter is not the way to go. Make sure you have a scale in your kitchen, such as this Escali one that I personally own.
Learning how to cut a great twist can be difficult at first - unless you get a y-shaped vegetable peeler, that is. This Kuhn Rikon peeler is the ideal shortcut to perfect strips of citrus, and, once you use it a few times, you’ll probably start to resent your paring knife.
Get a Kuhn Rikon peeler ($10) →
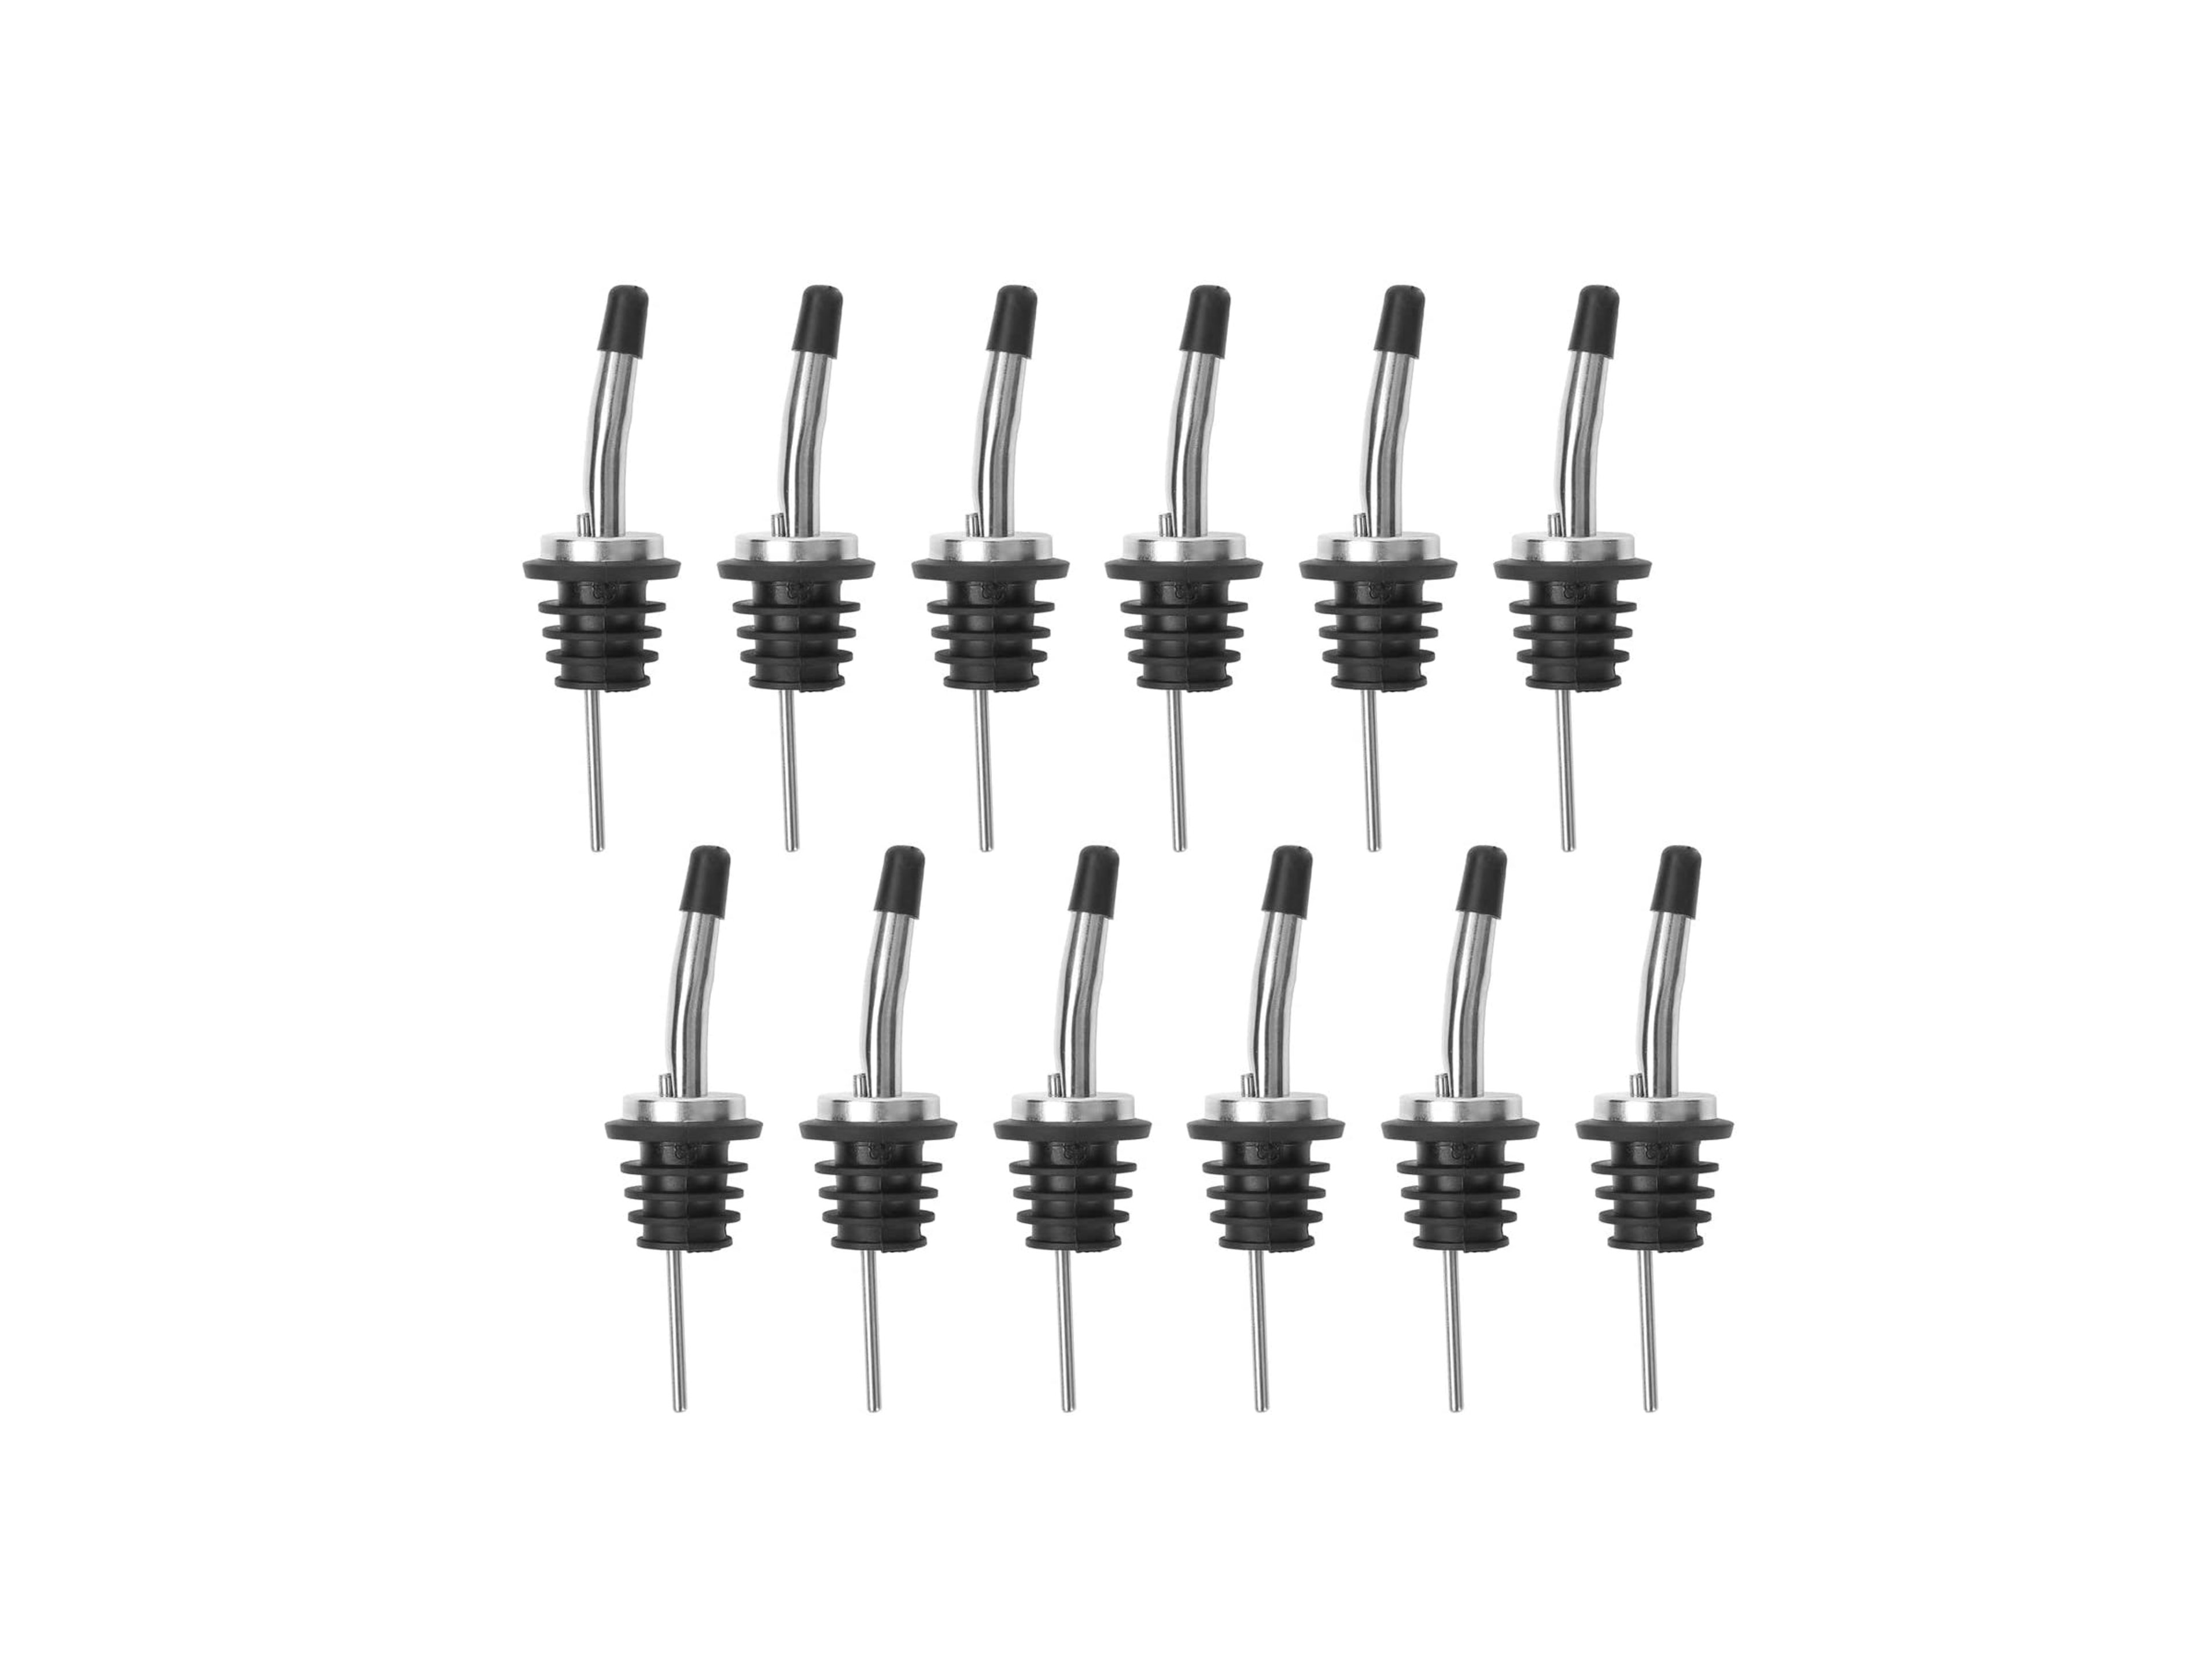
If you’re trying to figure out why your life isn’t like the (not very good) movie Cocktail, it’s probably because you don’t own any speed pourers. Throw these on top of your bottles at home, and you can pour your booze the professional way. Also, you’ll spill less.
Get steel speed pourers ($10 for 12) →
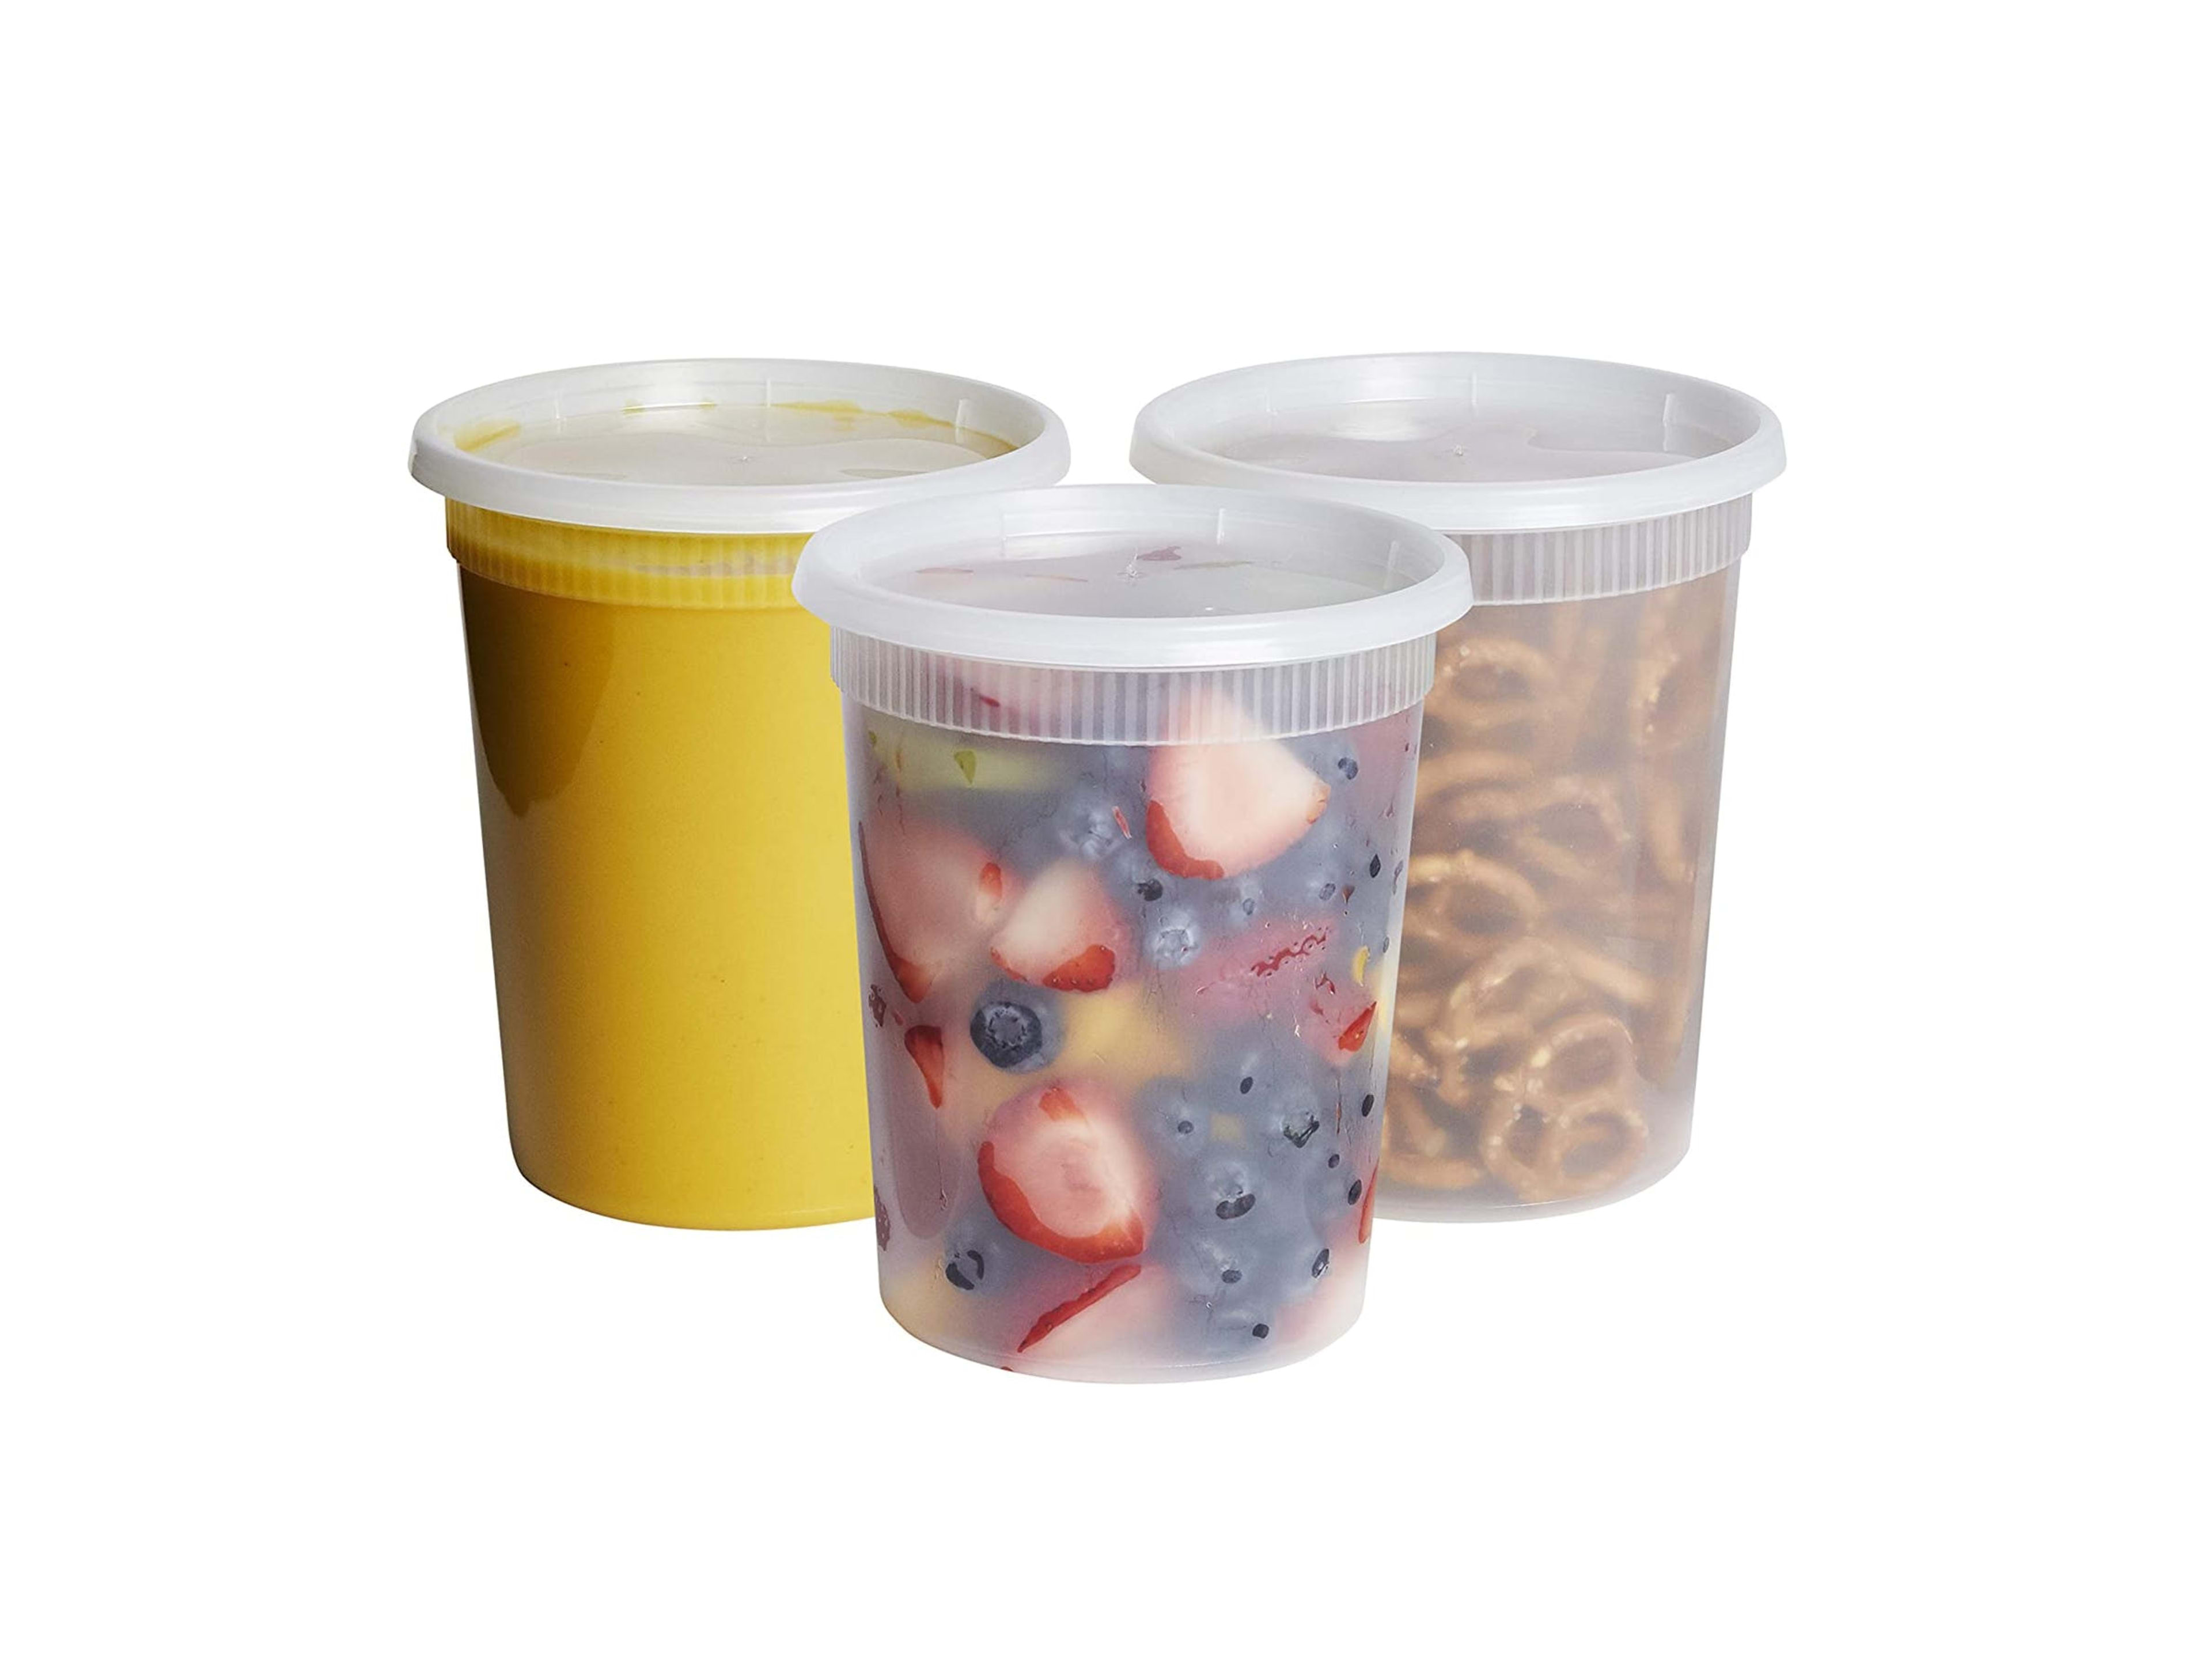
These quart containers have been a ubiquitous presence at every single bar and restaurant where I’ve worked. They’re cheap, durable, reusable, and perfect for storing batches of lemon juice or simple syrup.
Get some quart containers ($19 for 24) →
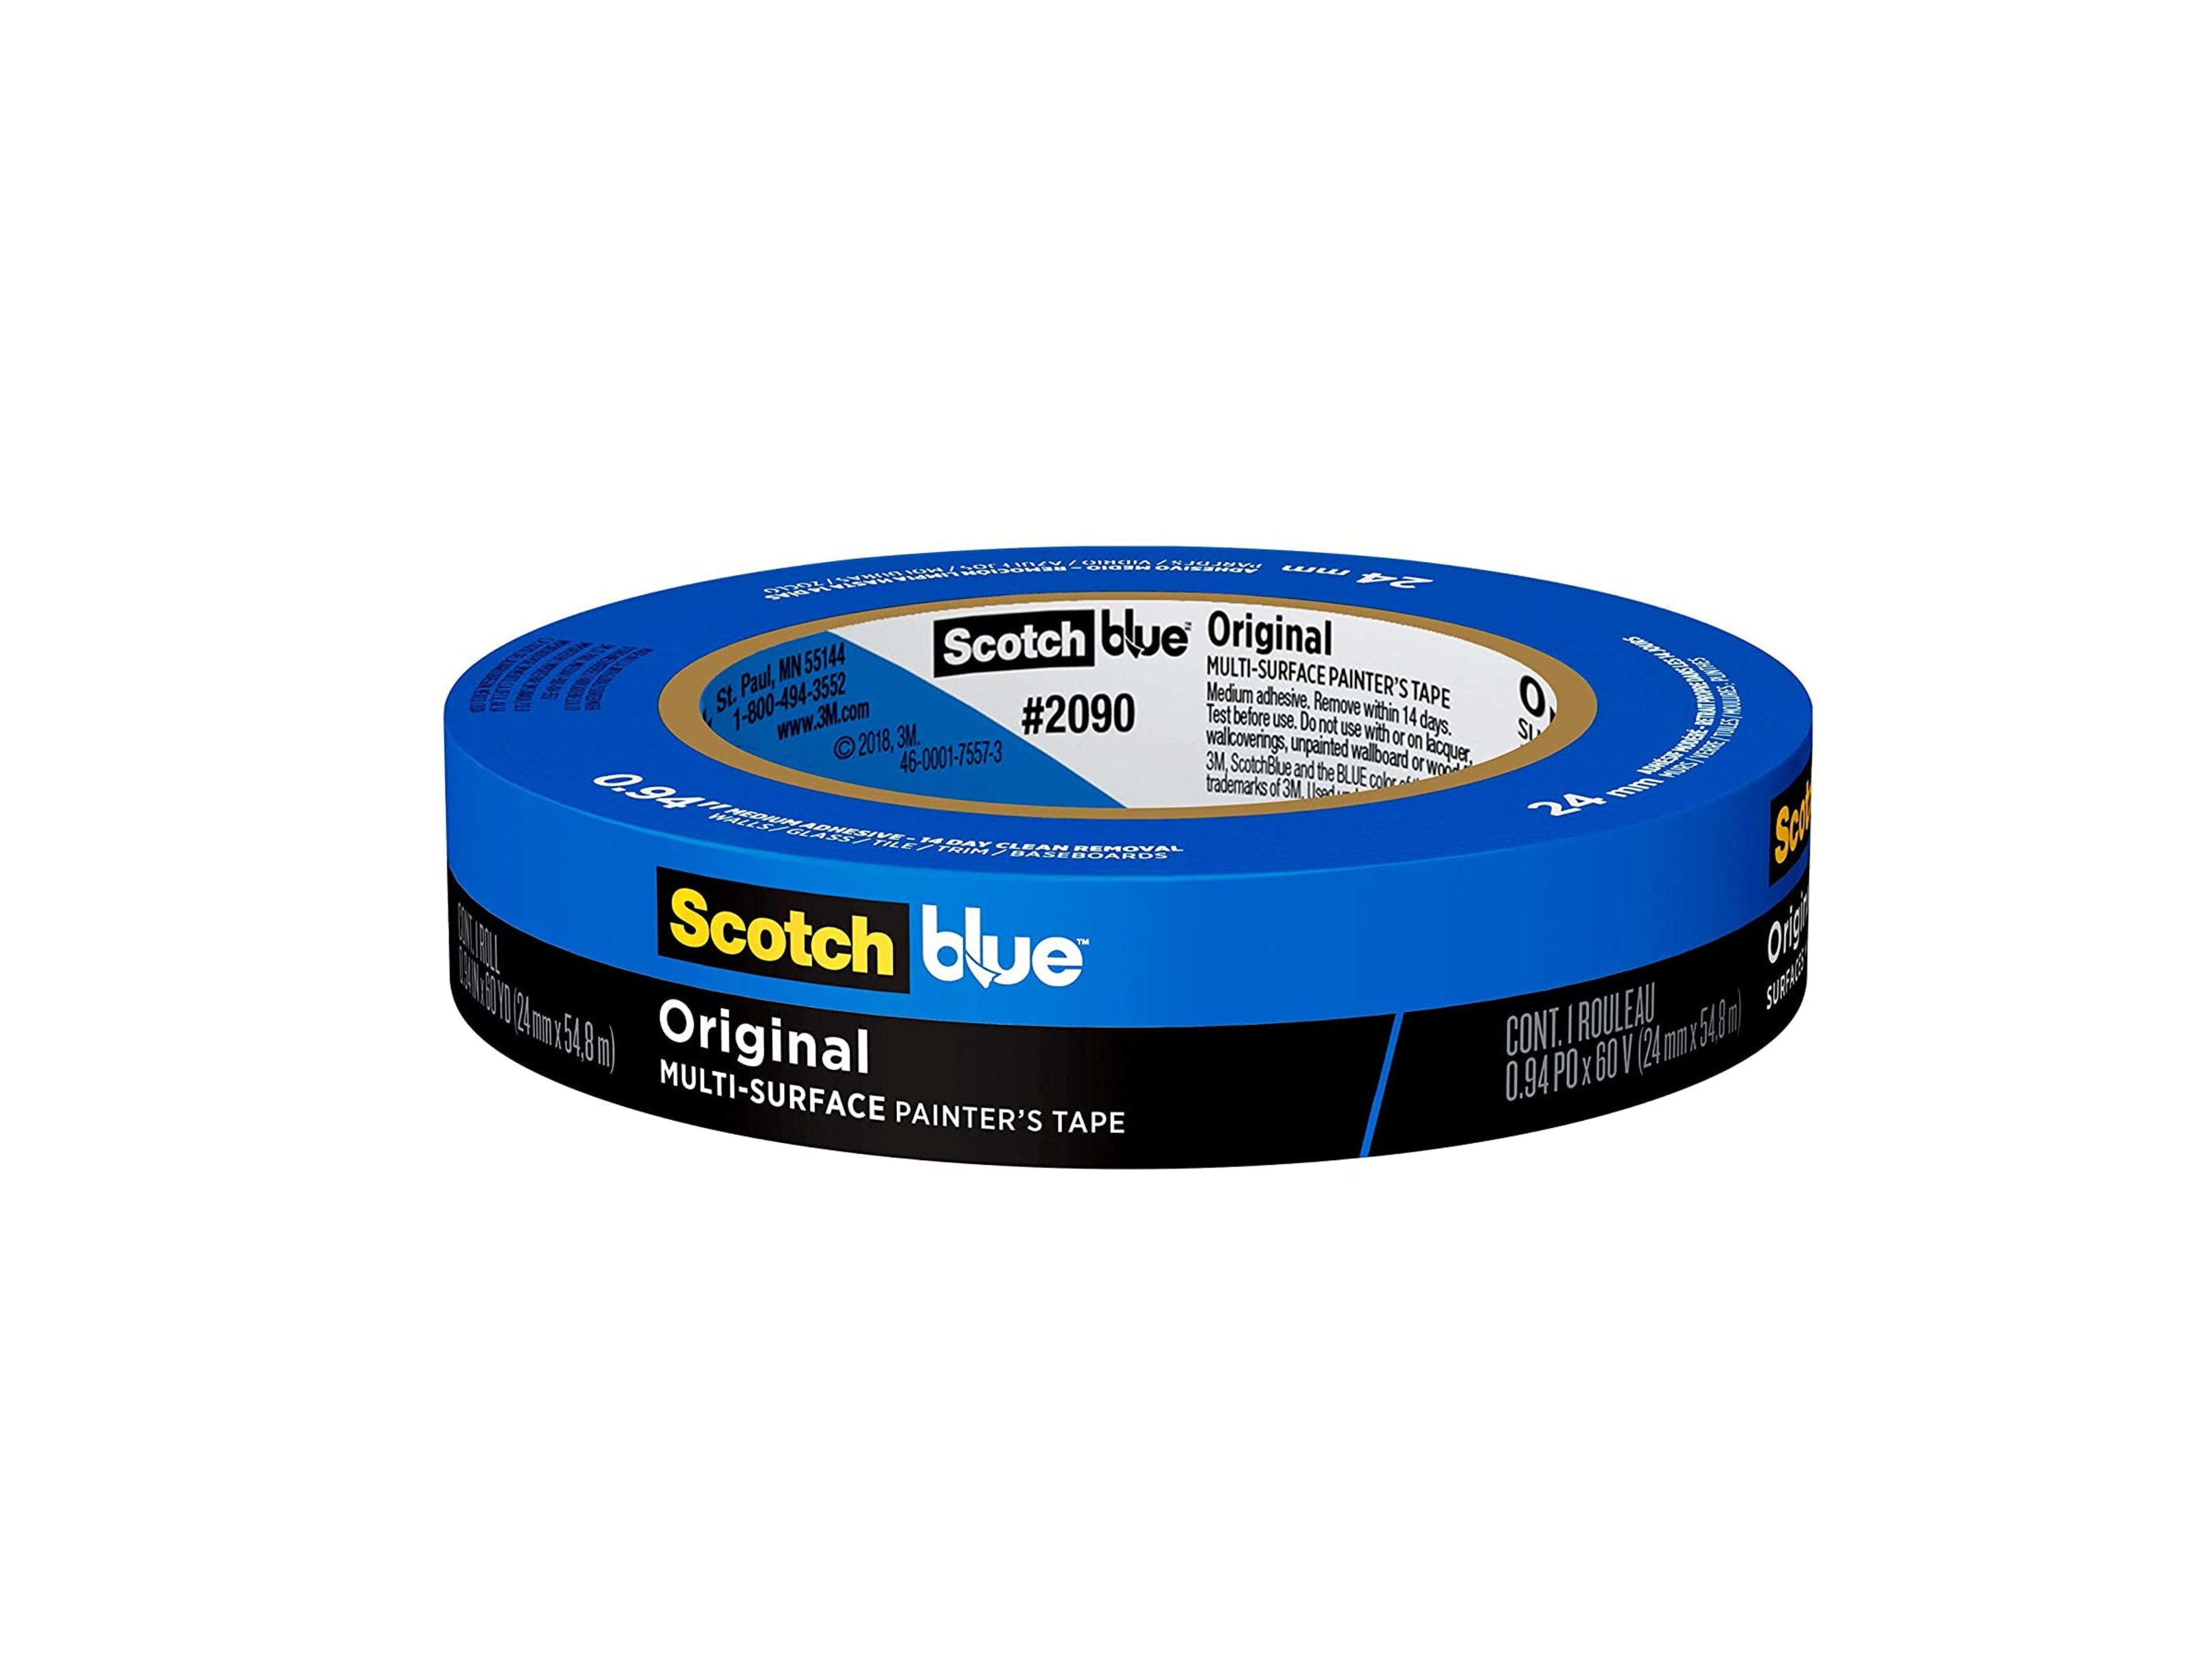
What else do a lot of bars and restaurants have? A healthy supply of painter’s tape. It’s what you should be using to label all of your quart containers, so that you don’t accidentally make a Gin Gin Mule with 6-month-old lime juice.
Get some painter’s tape ($4) →
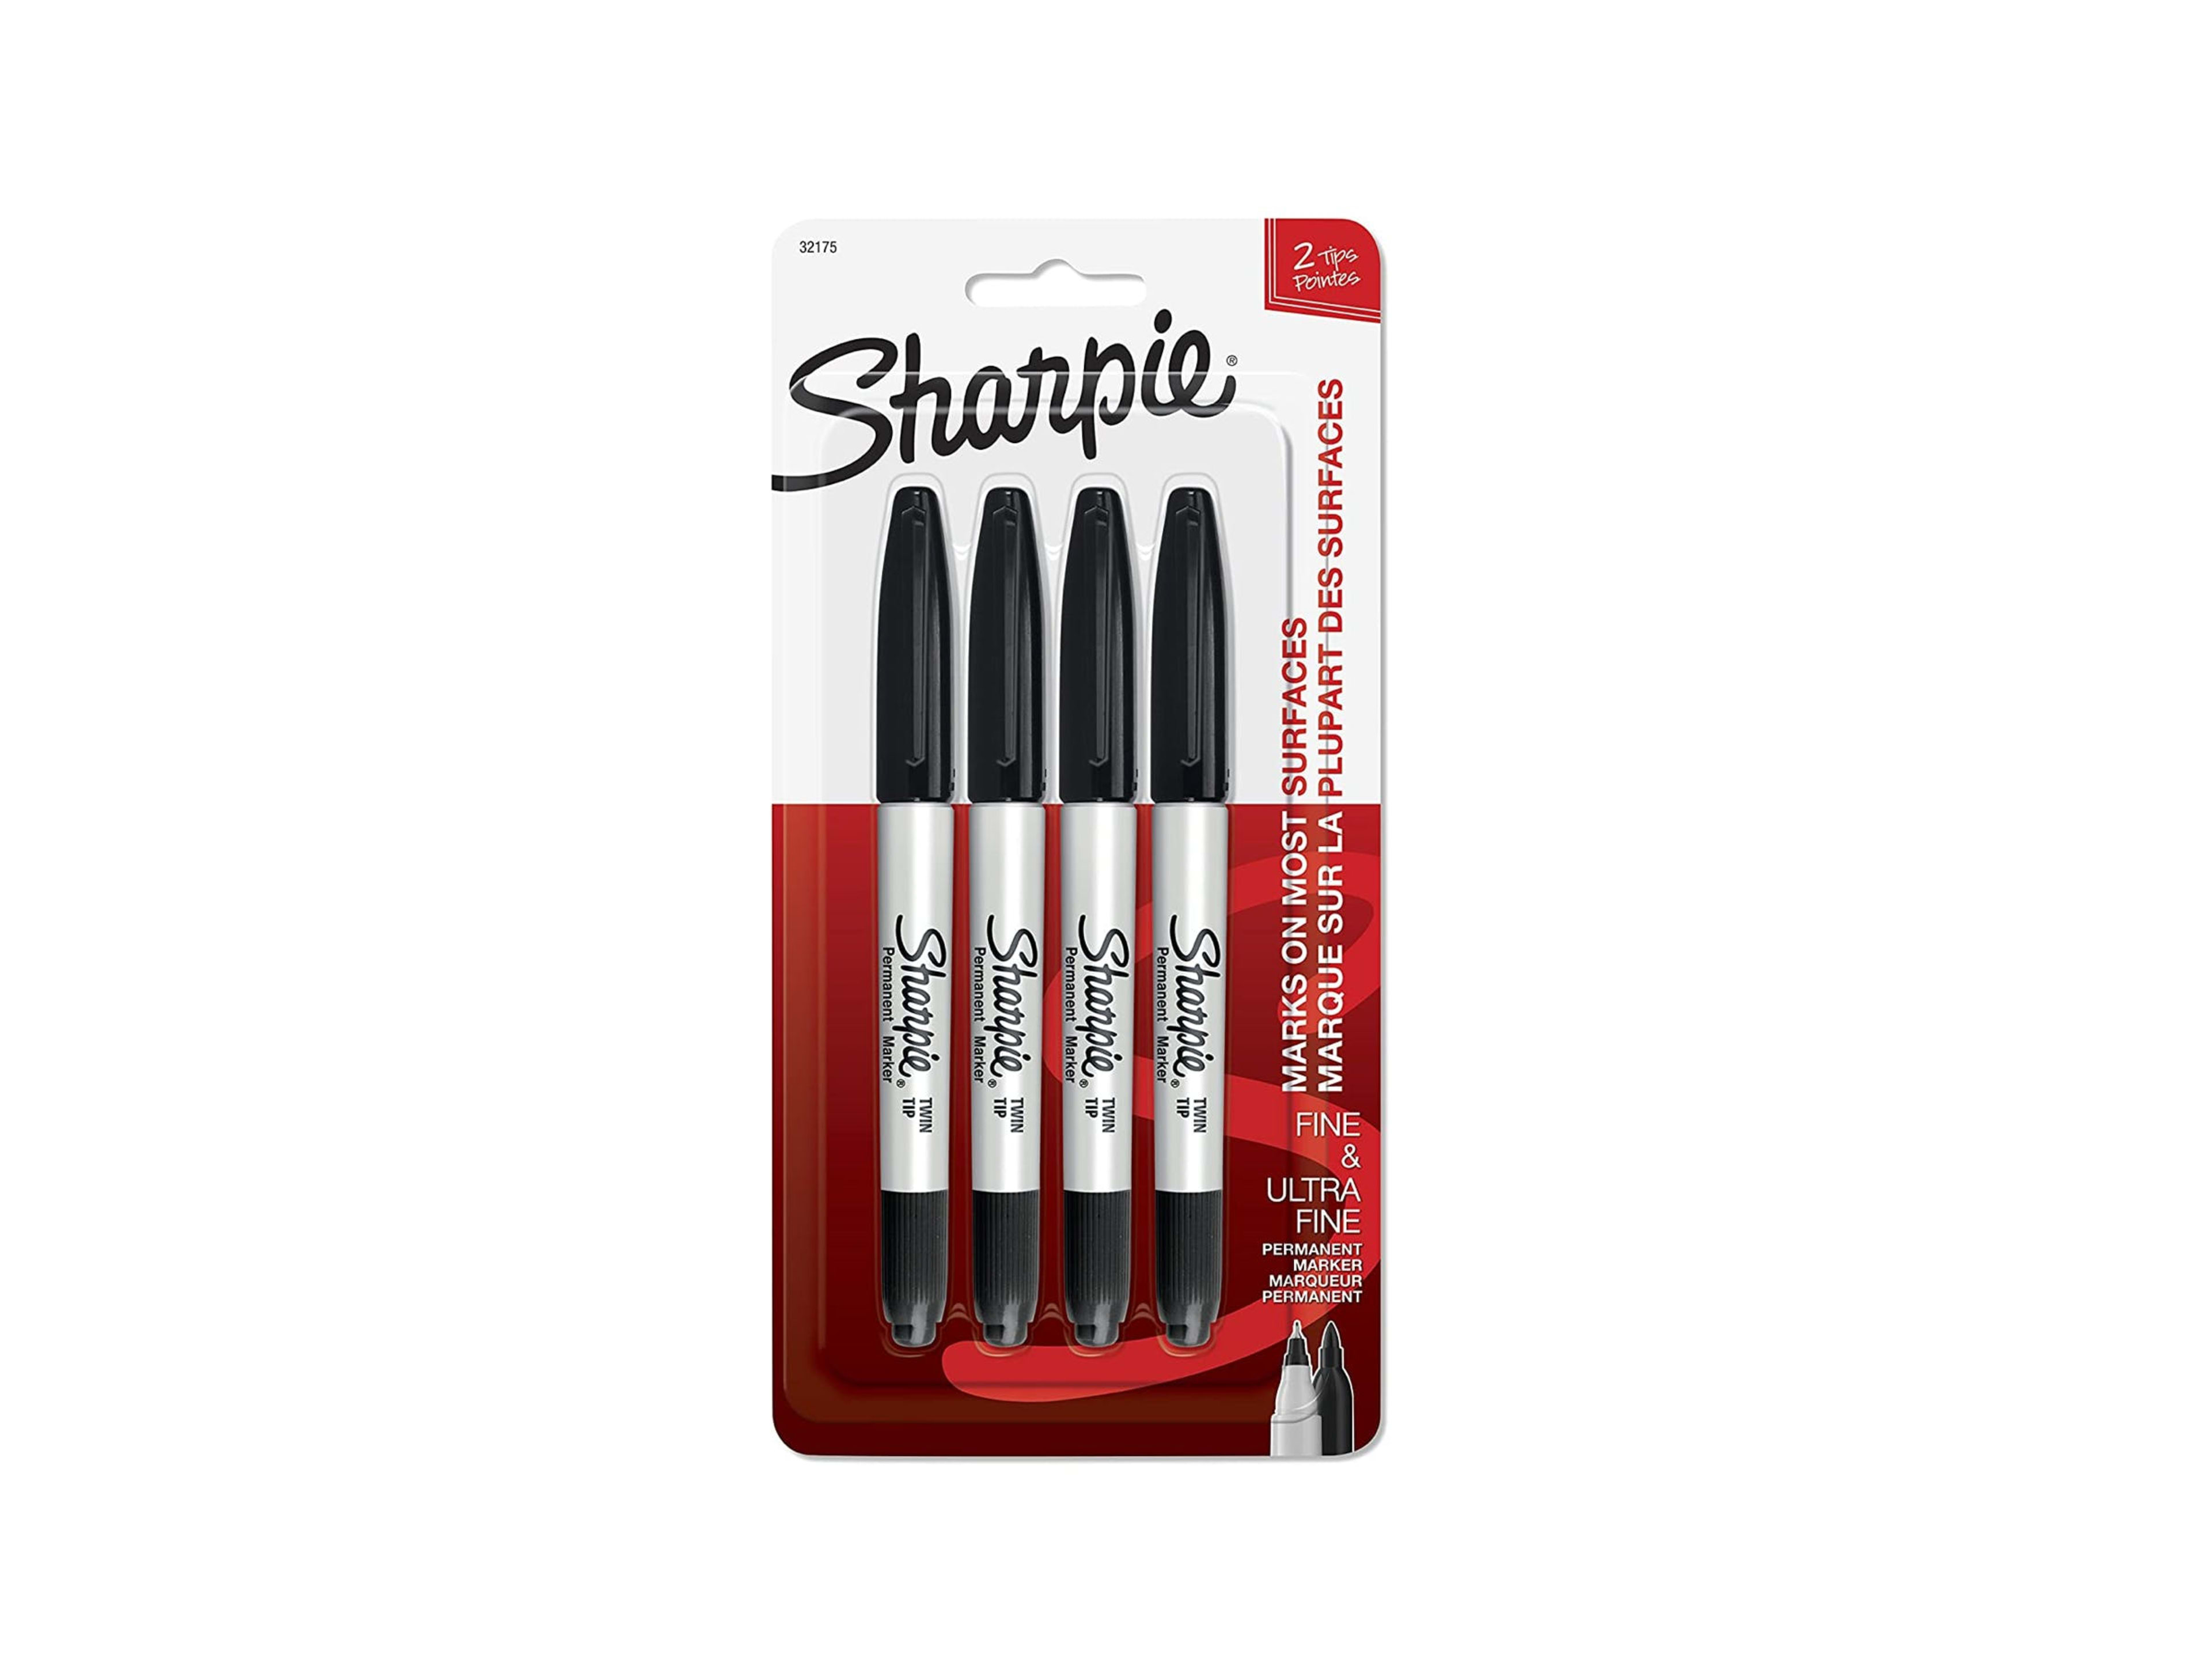
To this day, whenever I see a Sharpie that does not belong to me, I feel a strong urge to put it in my pocket. That’s because Sharpies are super helpful for writing on painter’s tape (ball-point pens aren’t great with moisture and can perforate your tape), and they always seem to be in short supply at bars and restaurants. Buy a few, and complete your labeling kit.
Get some Sharpies ($5 for 4) →
We’re recommending these products because we actually use, and like, them. Things you buy through our links may earn us a commission.